# VS Code Version Control: Understanding the basics of Git operations # 1
Visual Studio Code (VS Code) is one of the most used Integrated Development Environments (IDE) with lots of features which most users don't know about (including myself, I can't say I've used all the features that VS Code provides 😃).
So in this article, we'll look into a feature we developers would probably use frequently in VS Code: the Version Control feature called Source Control in VS Code. Understanding some of the various operations, how they translate to the Git commands and how the operations are useful for managing source control in VS Code.
> **Note:** Please feel free to jump around the Table of Content cause you might not need all the information if you already know about them, but you could read all and probably learn something new
## Prerequisite
- Basic knowledge of Git
- Basic knowledge of VS Code interface
## What's the Source Control or the Version Control
The Source Control or Version Control is a system used to manage all activities carried out on a computer program which is also referred to as a human-readable program known as the **source code**.
> If you'll like to read more about what Source Control or Version Control is, please do [here](https://en.wikipedia.org/wiki/Version_control).
## Source Control Panel on VS code
VS Code uses Git right out of the box as its primary Version Control system, which means you'll need Git installed on your PC before using Git through the Source Control sidebar on VS Code.
To get Git on your machines, follow the links below:
**For Windows OS**
[Download Git for Windows](https://git-scm.com/download/win)
**For Linux OS**
[Download Git for Linux](https://git-scm.com/download/linux) or run the command on the terminal
```bash
sudo apt install git
```
**For Mac OS**
[Download Git for Mac](http://git-scm.com/download/mac)
Now that we've got Git installed on our various machines, we need to config Git to our machine. Don't worry; this step is a one-time process.
### Setting up Git for VS code
Firstly, we need to set up our identity through the terminal, which can be opened/closed on VS code by using `(Ctrl + J)`. Our username and email address are needed to set up our identity for Git.
```bash
git config --global user.name "John Doe"
git config --global user.email johndoe@example.com
```
> **Note:** Please do change `" John Doe"` to your username as it is on Github and also the email address `johndoe@example.com` to your email address
The next step is configuring the code editor, which is being used to access Git; since we're using VS code, we input the command below into the terminal.
```bash
git config --global core.editor "code --wait"
```
> If for any reason you're making use of a different editor, do visit [here listing out the commands for other editors](https://git-scm.com/book/en/v2/Appendix-C%3A-Git-Commands-Setup-and-Config#ch_core_editor)
Lastly, we need to set up the default branch name. Recently, the default Git branch name was changed to `main` from `master`, so to configure the branch name, we make use of the command:
```bash
git config --global init.defaultBranch main
```
That's it! Git is fully configured on our machines; we can now go back to explore the Source Control Panel.
> **Note:** [Read more about Getting Started First Time Git Setup](https://git-scm.com/book/en/v2/Getting-Started-First-Time-Git-Setup)
## Working with the Source Control Panel
Now that we know what Source Control is let's dive into VS Code and explore the various options that it provides.
The source control panel can be accessed using the keys `(Ctrl+Shift+G)` or by clicking the icon below on VS code.
While working on a directory/folder in VS code and having the source control sidebar opened, two options will be shown, which are:
- **Initialize Repository**
- **Publish to Github**
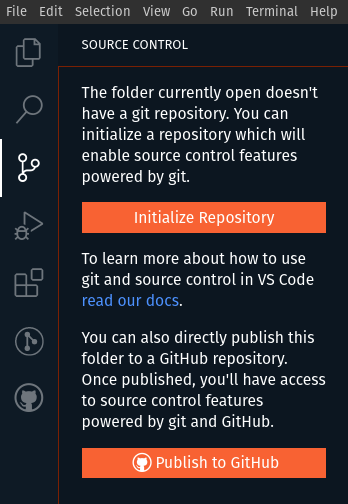
**Initialize Repository** when clicked create a `.git` folder, which is hidden by default in the working directory (or current folder being used) except you turn on the option of showing all hidden files on your PC file explorer, that's when it's visible.
The `.git` folder contains all the necessary information for a project to be recognized as a version control project, information about commits, branches, remote repository addresses etc are all managed in the `.git` folder.
The equivalent of clicking on the **Initialize Repository** button is the command below, which can be run on the terminal.
```bash
git init
```
The **Publish to Github** button when clicked, pops out a dialog for entering a repository name. By default, the name of the folder housing the project files would be selected as the name of the repository but it's changeable.
> **Note:** you can't publish to Github if you've not connected VS code to Github.
### Connect Github with VS code
There are various means to connect VS Code to GitHub, well we'll go through just one means, which is clicking on the **Accounts** icon, at the bottom of the sidebar.
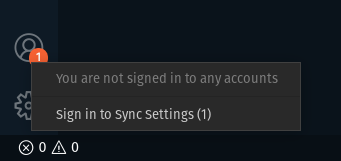
Then we click on the **Sign in to Sync Settings** option which present us with a pop-up, signifying if we'll like to sign up with Microsoft or Github.

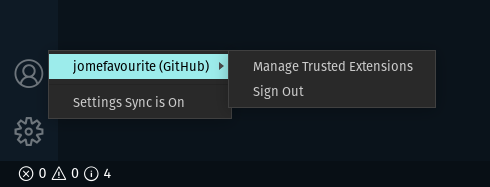
Let's signup with Github, upon clicking on the option we will be redirected to the browser window, where we are to click on the **continue green button**, which then signs VS code with Github. To confirm it worked correctly, go to the "Accounts Icon" on the sidebar once more, this time you should find your GitHub username displayed.
Great! We've been able to completely get VS code up and running with Git and Github. Now let's look into the various features that VS code offers through the Source Control panel.
## Recording Changes to Git
When a project is initialized with Git either by clicking on the **Initialize Repository** or running the command `git init`, all the files or folders in the current directory move to an **Untracked State (U)** shown underneath the **Changes Dropdown** at the Source Control Panel.
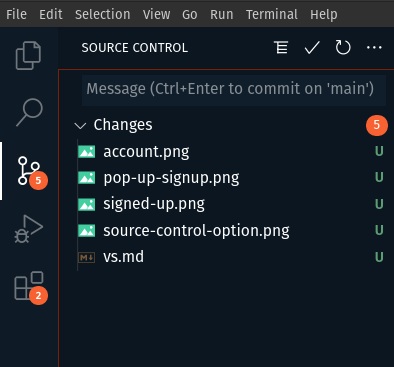
> **Note:** the `U` at the right side of each file from the image above means **Untracked**, and this shows on files that Git doesn't recognize.
> **Remember:** the `.git` folder is created once git is initialized in a folder, which keeps track of all the files
Let's go over some features, which are accessed by icons on the files.
### Discard Changes
Discarding changes on a file or files simply means removing the file/files from the **changes dropdown**, deleting all changes made to the files that haven't been committed. In this case, we've not committed our files and there still in the **Untracked State** so if the files were to be discarded all the files will be deleted, so be really sure you want to discard a file or the entire files to be committed.
> **Note:** To discard changes, you make use of the hook-like icon shown below:
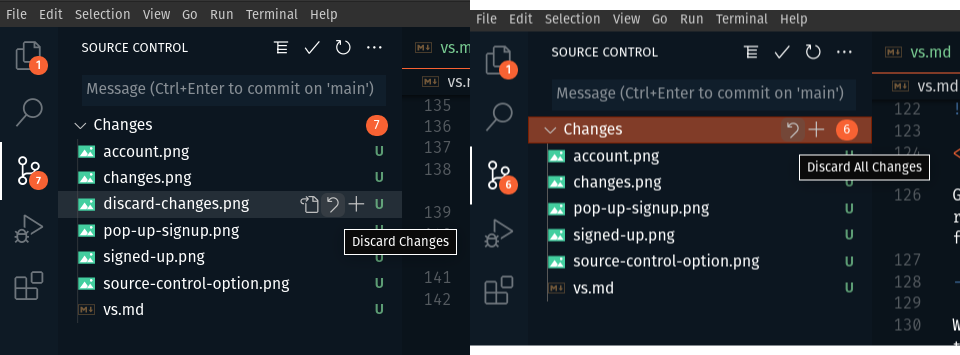
> **Note:** Each file underneath the **Changes Dropdown** also have the Discard icon
### Stage Changes
Stage changes mean that the file or the files are to be tracked by git. At this point, the file(s) are in the **Tracking State**, which means git recognizes that these files would be committed.
> **Note:** The files in the Staged Changes dropdown only shows those changes/files to be committed or rather that are being tracked by git
You must have used the command shown below if you've ever used git before. All you're doing with the command is to tell git, hey, I'll like you to keep track of these files or a file, which means you're staging the file/files.
```bash
git add
```
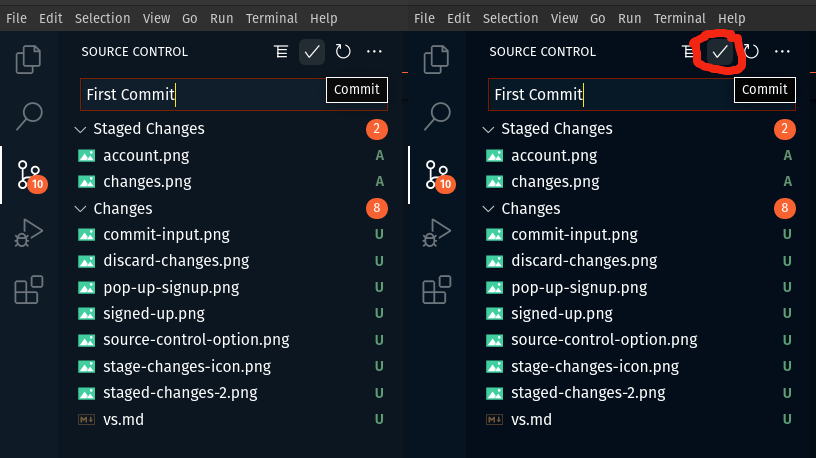
To add file(s) to the Stage Changes on VS code, you click on the **+** icon on each file or on the Changes dropdown.
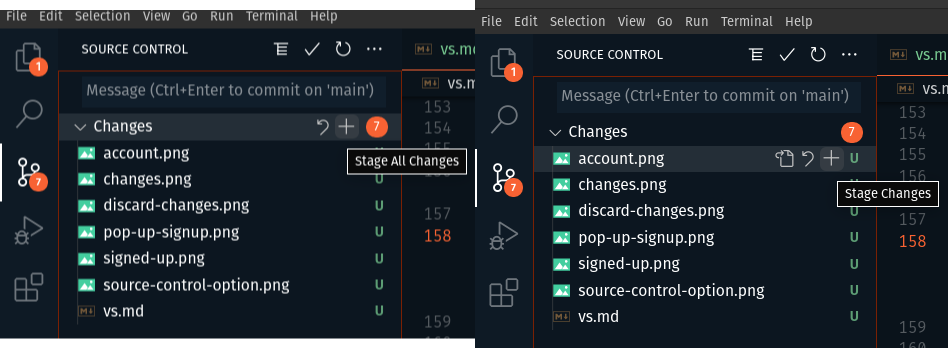
From the image above, I'm going to stage both account.png and changes.png files. By doing this, a new dropdown would be created named the **Staged Changes**
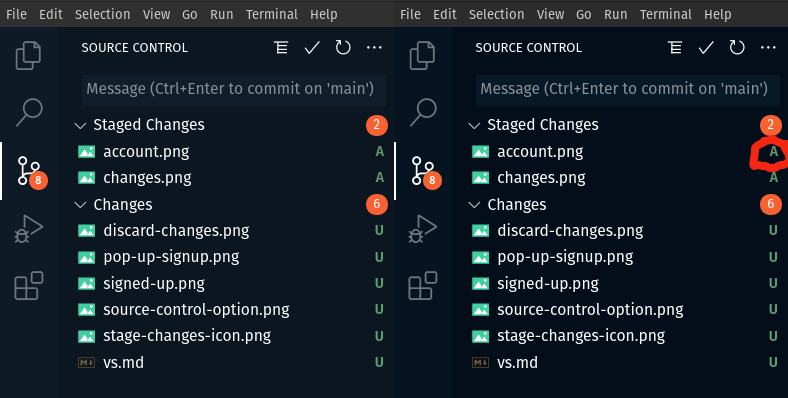
> Notice the **A** letter added to the files at the Staged Changes dropdown, it means **Added**, which denotes that git is keeping track of the files
## Committing Files
While following Git command instructions, here's how we'll commit a file/files to Git:
```bash
git commit -m "First Commit"
```
Now using VS code, in order to commit out staged files which are `account.png` and `changes.png`, we go to the message input at the top of the Source Control Panel.
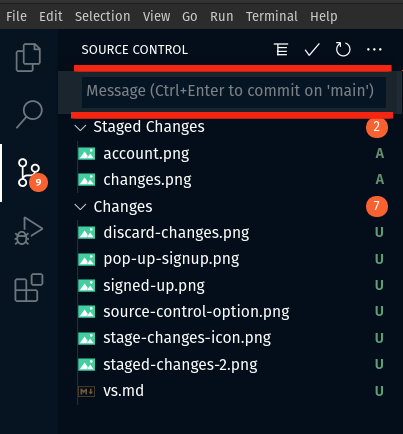
Then we type in a message like "First Commit", then click in the **checkmark** icon to commit the files.
Once the Staged changes files have been committed, the files wouldn't be seen anymore on the Source Control panel, because Git now recognizes those files as its own.
## Publishing to Github
To publish the committed files to Github, we'll need to move to VS code Status Bar, right at bottom of the IDE.
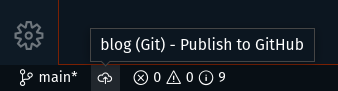
> **Notice:** from the image above, it says "blog (Git) - Publish to Github". This is because my working directory/folder is named **blog** that's why you can see the blog there. Also, whatever the working directory name is, that will be taken as the default repository name but still changeable.
The next step would be to click on the icon next to the branch name which is **main**. When the icon is clicked there would be a pop up prompting you to sign up using Github.
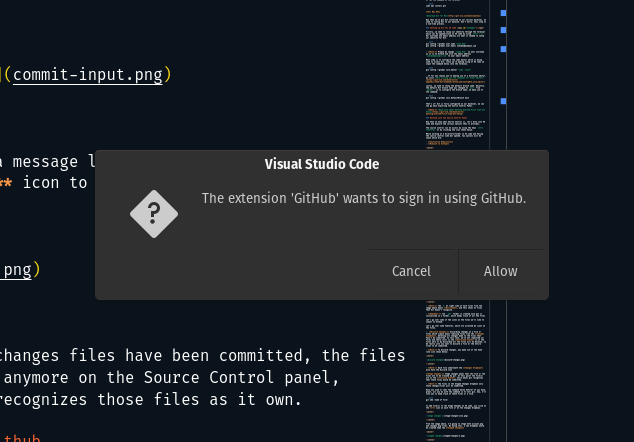
Click on **Allow**, which then redirect you to the browser, click on the continue button and that's it, next off would be to input the repository name.

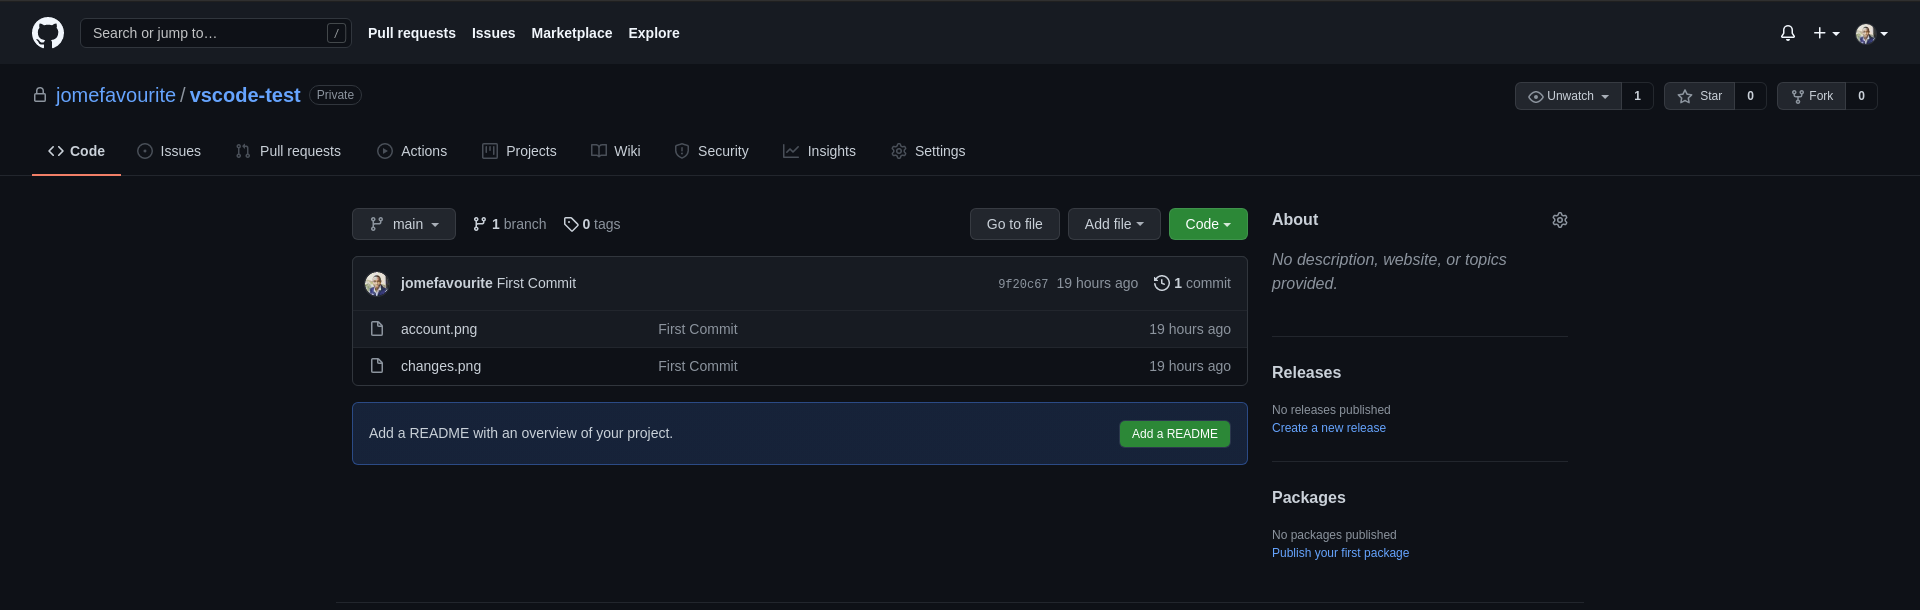
From the image above, the repository name is "vscode-test", then you can decide if you'll like the repository to be private or public, once you either pick private or public it should show an indication at the right bottom view of VS code that the repository is publishing.
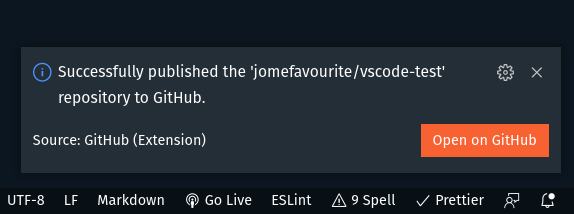
Once it shows "successfully published...", you can open Github to view the newly created repository.
## Conclusion
We've covered how to set up Git in VS Code, how to initialize a repository and then publish the repository. In the next part of the article, we'll look into more advanced operations like Stashing, Switching between branches, Synchronization and many more.
Thanks for reading! I hope you find the article useful and don't forget to like and share the article.
See you in the next article! 👋
## Resources
- [Using Version Control in VS Code](https://code.visualstudio.com/docs/editor/versioncontrol#_initialize-a-repository)
- [Getting Started - First-Time Git Setup](https://git-scm.com/book/en/v2/Getting-Started-First-Time-Git-Setup)
- [Git Basics - Recording Changes to the Repository](https://git-scm.com/book/en/v2/Git-Basics-Recording-Changes-to-the-Repository)